Without proper organization, your Google documents will fall apart and can reduce your work efficiency. Creating folders and organizing the documents you have into them is the right step.
Luckily, in Google Docs, you can easily create folders from documents you're currently open. And all files you create on Google Docs com are also automatically saved to your Drive account.
Here's how to create a new folder to organize your Google Doc files.
# How to Create/Add Folders in Google Docs
Go to the Google Docs com page, and sign in with your Google account.
Step 1
Open one of the documents, which is on your Google Docs homepage with a double click.
Step 2
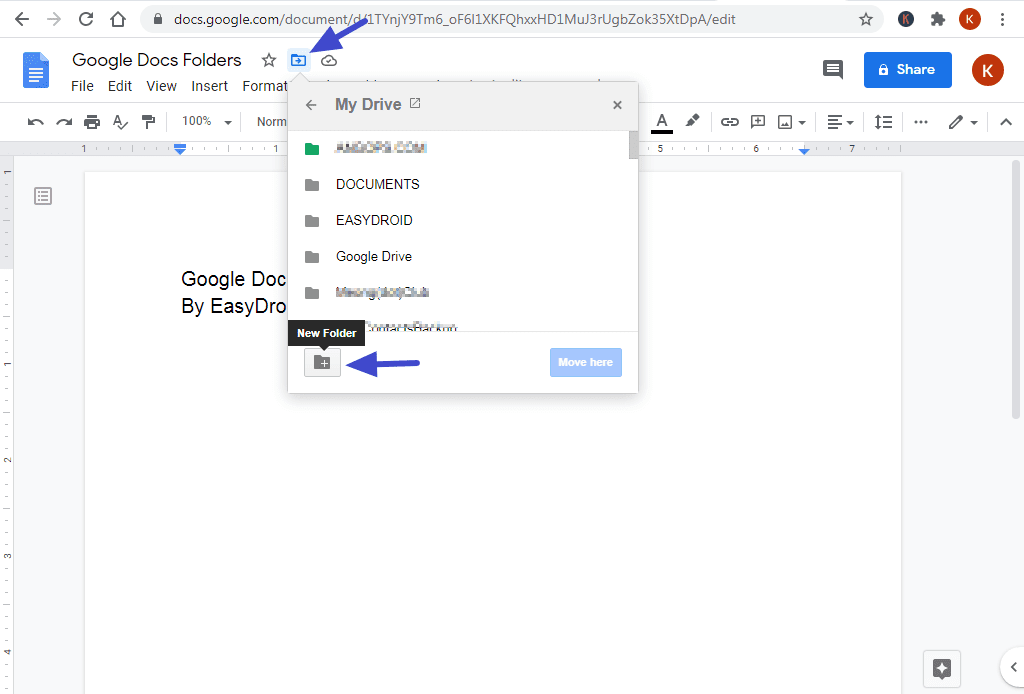
Click the folder icon at the top, just to the right of the document title, to create a new folder.
Step 3
A menu box will appear. Click the folder icon with the plus sign at the bottom.

Step 4
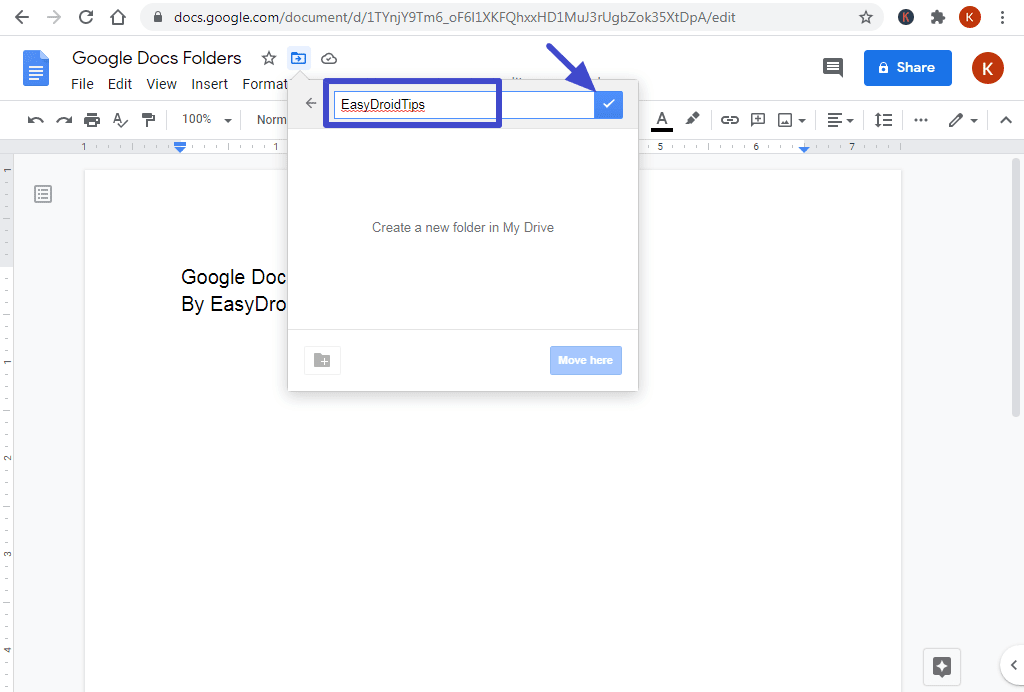
Give your new folder a name, and click the checkmark next to the title box.

Step 5
Now the new folder is finished and ready for you to use. Click the blue "Move here" button to move the document you're working on to that folder.
Any folders created on Google Docs com will be visible in your Google Drive account.
# How to create or add a new Google Doc in Google Drive folder
Creating a new Google Doc, you can do inside your Google Drive folder quickly and easily, with just a few clicks. Here's how:
Step 1
Open your Google Drive folder by double-clicking it.
Step 2
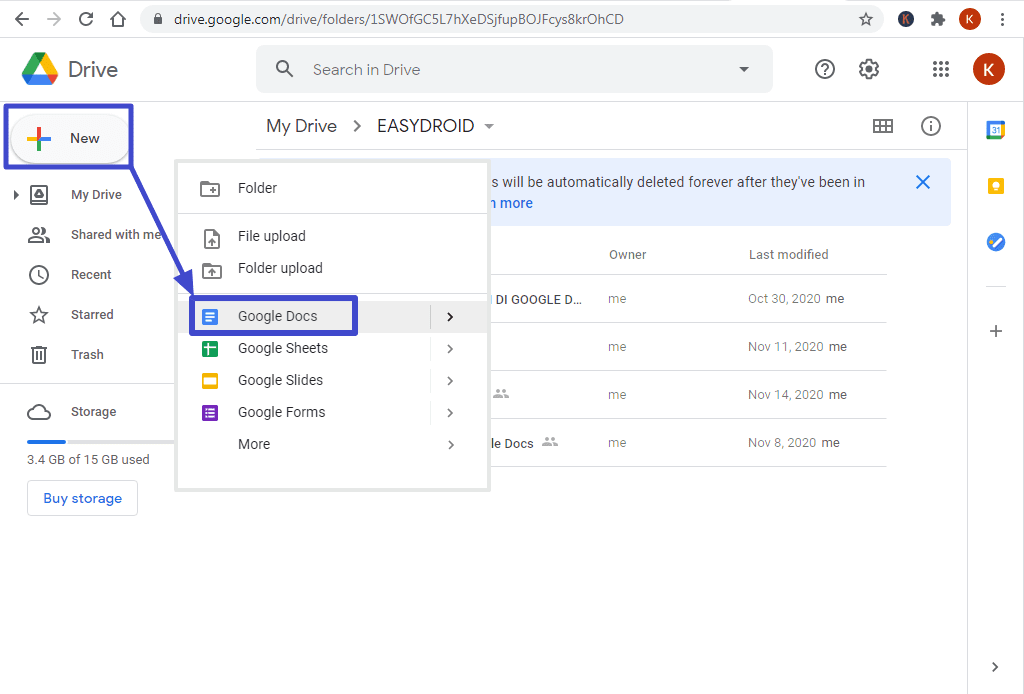
Click "New" with the colourful add icon in the left menu, just below the Google Drive logo, and click "Google Docs" to create a new document.

Step 3
Now your new document has been created and is automatically saved in the folder where you made it.
You can create multiple folders in Google Docs to manage documents according to their categories, business files, campus assignments, or other documents that you've made on Google Docs com.
Read too: